
Hemispherical Sundials
Paper models of ancient Greek sundials, with solstice and equinox curves.
If you've tracked the sun across the sky, you've discovered that the path of the sun across the sky across the sky is not simple. But once you understand the nature of the “sun's highway” across your sky, you can make a “sun-tracking sundial” that can follow the progress of the sun through the solstices and equinoxes, as well as through the hours of the day.
One of the most straightforward ways of make a “sun-tracker” is simply to use a bowl, with something in the middle to cast a shadow. The bowl becomes an inverted model of the sky, and the location of the shadow on the bowl exactly mirrors the location of the sun in the sky. And by placing a grid or a “highway” of marks on the bowl, you can track the sun as it proceeds along the “highway” in the sky.
A Sundial For Your Location
Before we get to the downloads, I should probably warn you that these paper hemispherical sundials are a pain in the neck to make. Expect each one to take a couple of hours, and maybe longer if you want to make the fancy stand as well. If you want an alternative sundial with similar content that you can make easily in five minutes, I suggest the Butterfly Sundials. Those contain much the same information, and they are very easy to make. I'm quite proud of those.
But if you like a challenge, and you want to make something that nobody else in your neighborhood has, then by all means please help yourself to one of the following downloads.
If you study the sun's path across the sky in different parts of the world, you can see that the tilt of the sun's “wheel” in your sky depends on how far north or south of the equator you live. This means that every sundial must be custom-designed for the latitude in which it is to be used. In the menu below, there are links to PDF files containing hemispherical sundials designed for every 10 degrees of latitude.

Making the Sundial
The first page of the template contains a flower-shaped pattern that will form the bowl, the second page contains brackets and a trim ring that will form the upper rim of the bowl, and the third page contains two alternative options for the shadow-casting “gnomon” of the sundial. Start by printing all three pages onto medium-weight card stock. I've never actually tried making a hemispherical sundial out of normal typing paper, because I'm pretty sure that such a thing would be impossibly limp and floppy. Heavy-weight card stock would probably work, but I would worry that the sides of the bowl might not curve easily enough, and the bowl might end up looking more like a pyramid than a hemisphere.
Making the Gnomons
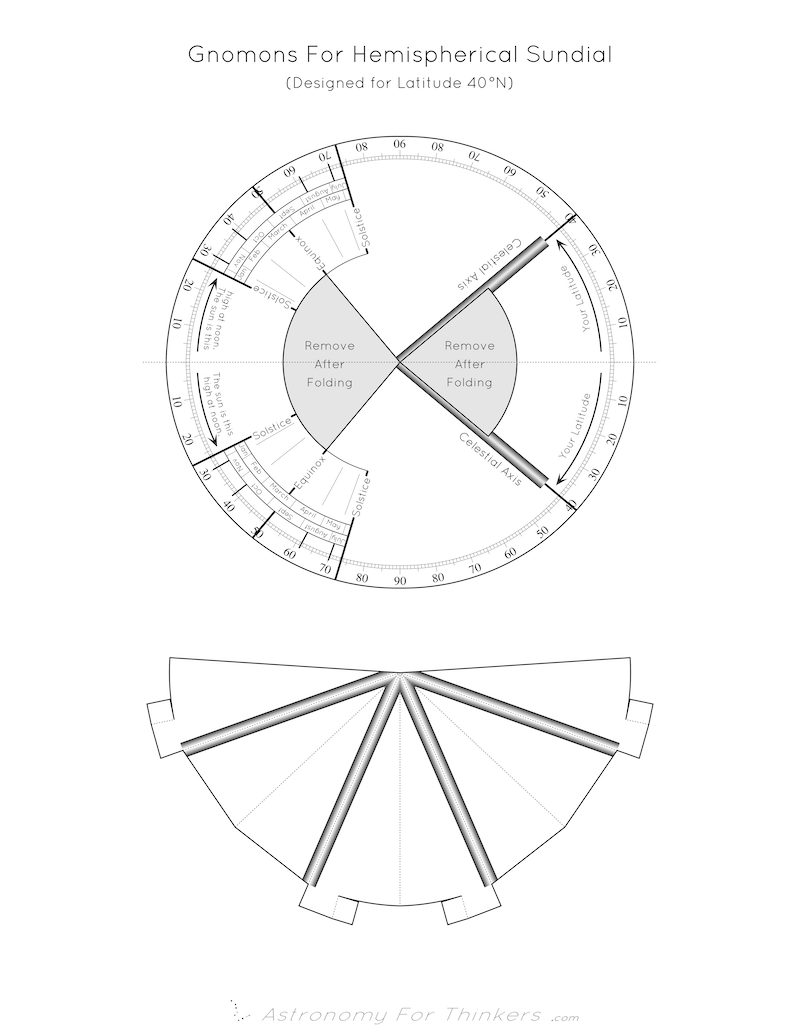
I have designed two possible gnomons: an “arrowhead gnomon” and a “protractor gnomon”. The former is a little more decorative, and is intended to be the more permanent piece, but the removable “protractor gnomon” is labeled with lots of information. They are interchangeable, but you can glue the arrowhead gnomon in place if you wish.
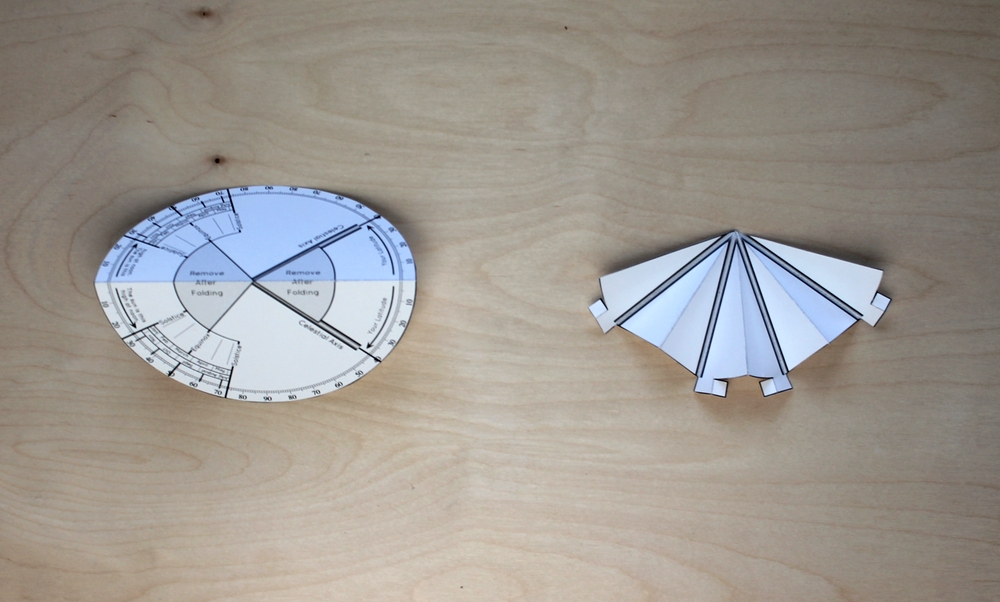
Before you cut out either gnomon, use a straight edge and a pin or something to score all of the dotted fold lines. This will give much straighter, crisper folds. Then cut out both parts all the way around the outline. This is what the two gnomons look like after they have been cut out and folded, but not glued:
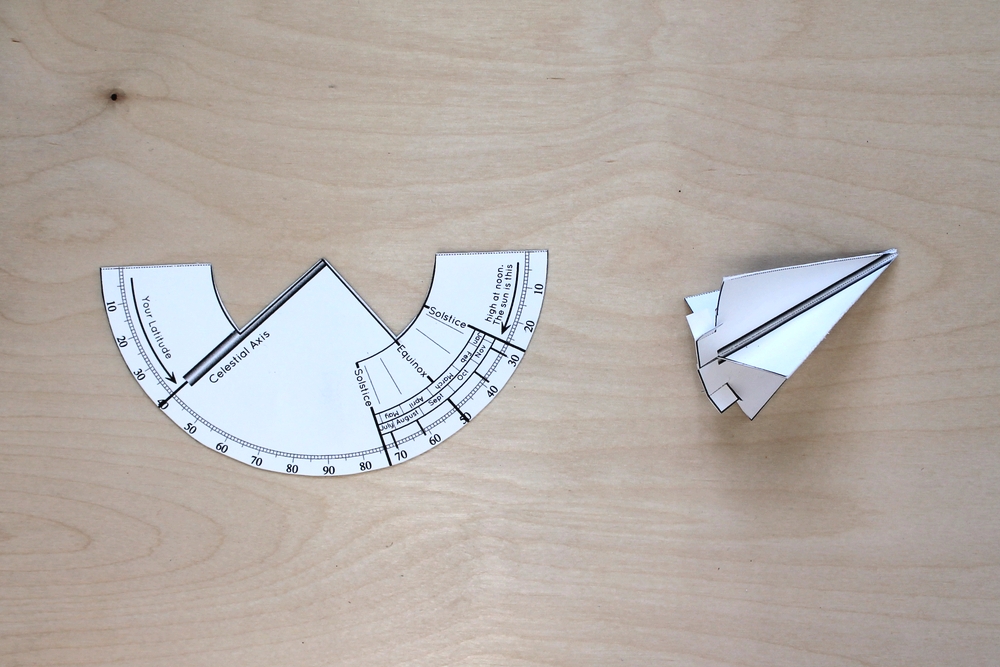
To make the “protractor gnomon,” fold it in half and glue the two sides together to form a semicircle. (Use the glue sparingly. If the paper becomes too wet, the resulting semicircle will be warped and not as attractive.) You may want to rest a heavy book on it while the glue dries to keep it smooth and flat. After gluing the sides of the semicircle together, cut out the triangles, leaving a right angle corner at the center of the semicircle. This corner will function as the “pointer” when you insert the semicircle into the bowl.
To make the “arrowhead gnomon”, cut it out around the perimeter, and then make short incisions where indicated, to create foldable flaps extending sideways from the tabs on the base. (There will be four such incisions, unless you live near the equator or near the poles, in which case there will be two.) Now fold all of the fold lines. The radial lines should be folded alternately as ridge and valley folds. Each plain dashed line not ending on a tab should be a ridge fold, and each axis decoration ending on a tab needs to be a valley fold. Fold and glue the entire structure into a four-flanged triangular “dagger” or “arrowhead”, with tabs at the bottom. When gluing each flange, I find it helpful to rest the flange against the edge of a table or book, and smooth the flange flat against the hard surface before the glue dries.
After gluing, the two gnomons should look something like this:
Hemispherical Bowl
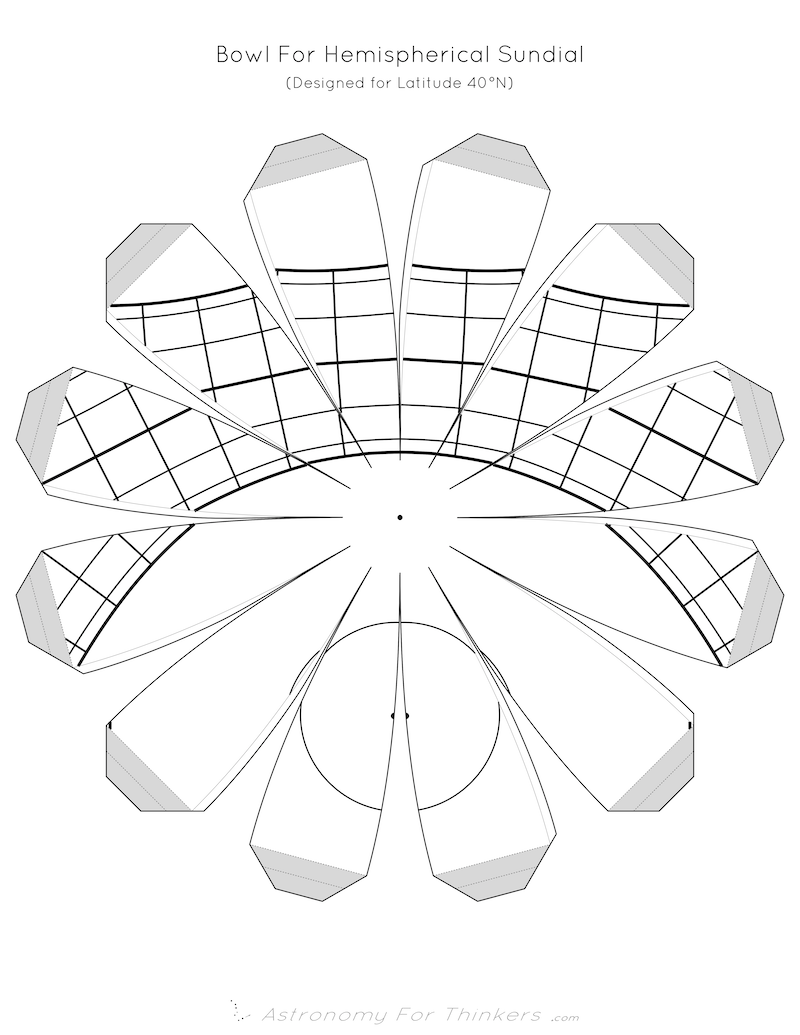
Now for the fun part. The bowl will be formed from the flower-shaped design on the first page, and the polygonal brackets inside the circle on the second page. The circular ring will form a final decorative trim to be glued to the upper surface of the bowl. Note that each “petal” of the “flower” has a thin overlap area along the counter-clockwise edge. This will overlap the adjacent edge of the neighboring petal, and is simply to help hide the seams between petals in the assembled dome. This overlap area is missing from the seam containing the north pole (or the south pole, for southern hemisphere sundials), so that the gnomon can be mounted along this seam.
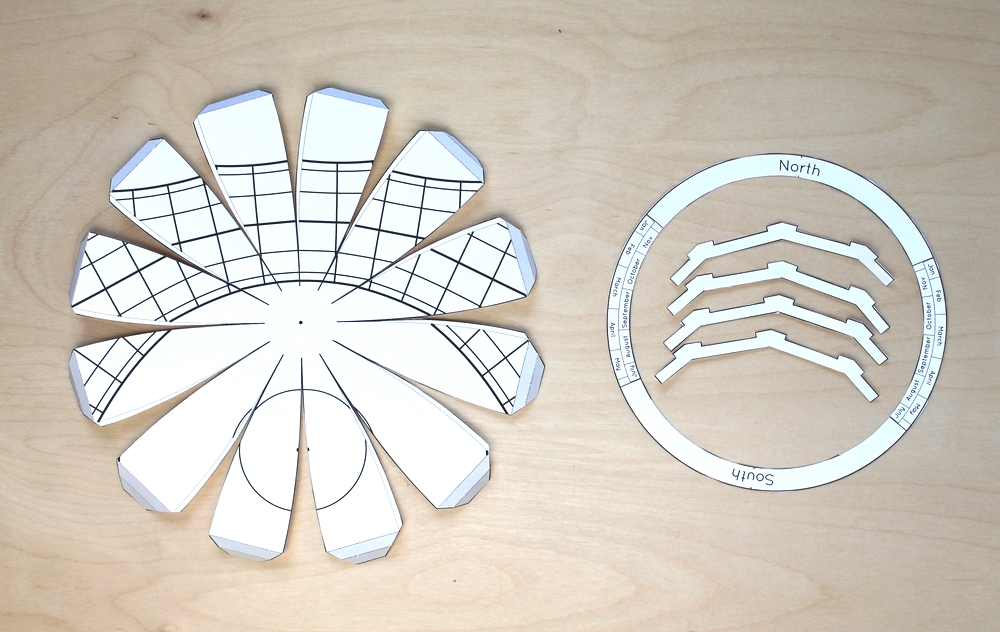
The gray trapezoids at the end of each “petal” are tabs to be folded, wrapped around the brackets, and glued into place. (This may be the most annoying part of the assembly. Sorry about that.) Start by scoring the two fold lines along the base and across the middle of each trapezoid, and then cut out the flower shape all around the outline. Also cut out the ring and the brackets.
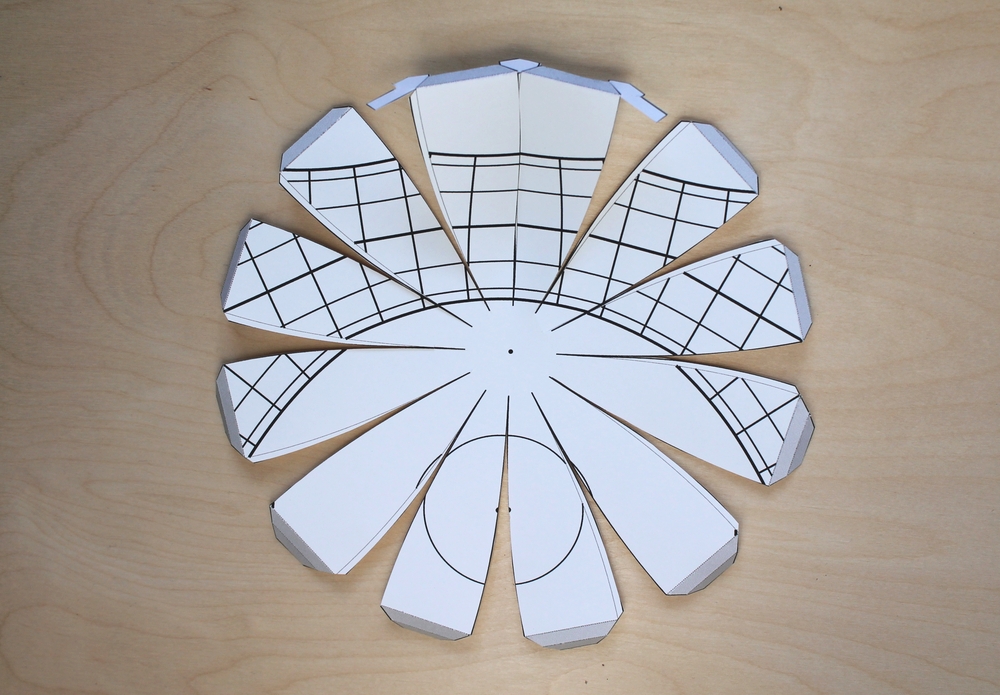
Now, working your way around the edge of the bowl, wrap each tab around a corresponding slot in one of the brackets, and glue it into place. Four of the petals will need to have their tabs wrapped around the half-slots on two adjacent brackets. (This is one of the first things I will change in any future designs. Again, I apologize.) This is what it should look like after gluing the first two adjacent petals to the first bracket, and then just before gluing all adjacent brackets together:
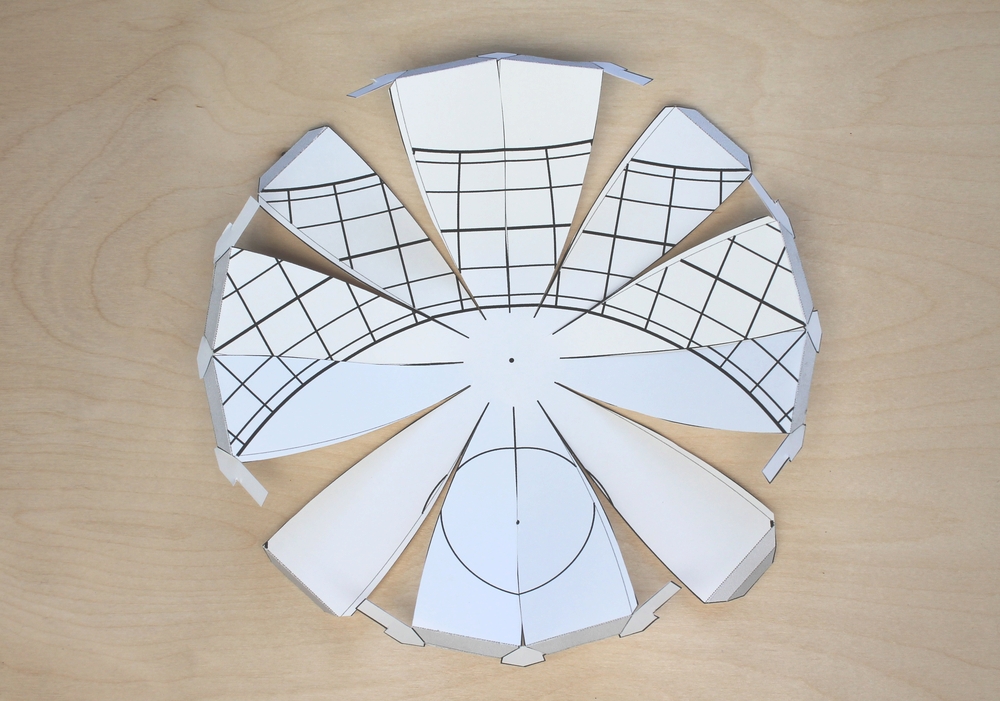
Once all of the petals have been glued in place to all of the brackets, the final step will be to glue the trim ring onto the top of the bowl. The “North” and “South” labels are meant to indicate directions in reality, in your yard or on your balcony or wherever you set your sundial. For the sundial to work, these must be aligned properly with the north-south seam of the bowl. If you live in the Northern Hemisphere, the “solar highway” marks should be on the northern side of your bowl, and if you live in the Southern Hemisphere, they should lie on the southern side.
Placing the Gnomons in the Bowl
The “protractor gnomon” is meant to be removable. You should be able to just rest it inside the bowl, along the north-south seam. On all sundials, there will be a black dot at a special location, the “sundial center”. This marks the “axis” of the “wheel,” i.e., the axis around which around which everything in the sky appears to rotate. If you are already convinced that it is actually the Earth that is spinning, and not outer space, then this axis is the axis of the Earth itself. The protractor gnomon is decorated with an “axle” or “axis” that should be parallel to the Earth's axis in reality. If you have the color version with the map, then one of the Earth's two poles should be visible on the map, and the axis on the gnomon should line up with that, too. The markings for the solstices/tropics on the gnomon should also align with the “solar highway” marks on the bowl.
The “arrowhead gnomon” can be glued into place if you wish, but I think it stays in place pretty well without glue. To fasten it in place, insert the tabs through the north-south seam in the dial, where the “circle center dot” is located. I've calculated the shape of the gnomon assuming that the single open flange of the gnomon faces downward towards the bottom of the bowl. (By “open flange”, I mean the one formed where the two extremities came together, rather than the other three which were formed along a fold line.) However, unless you live near the Equator, it shouldn't make much difference which way you insert the gnomon. Finally, lock it into place by bending the flaps sideways.
When inserted, the gnomon is meant to be centered over the “sundial center”, and should fill the surrounding black circle on the bowl. (In map versions, this circle should coincide with the Arctic or Antarctic Circle.) Esthetically speaking, I think this is definitely the prettiest way to place it. But practically speaking, it isn't really crucial that you mount the gnomon in the correct place. What is important is that the tip lies in the center of the hemisphere. You can check your alignment by gazing across the top of the bowl, from one end of any seam to the opposite end of the same seam, and ensuring that the tip of the gnomon is in line with the seam, and also level with the top of the bowl.
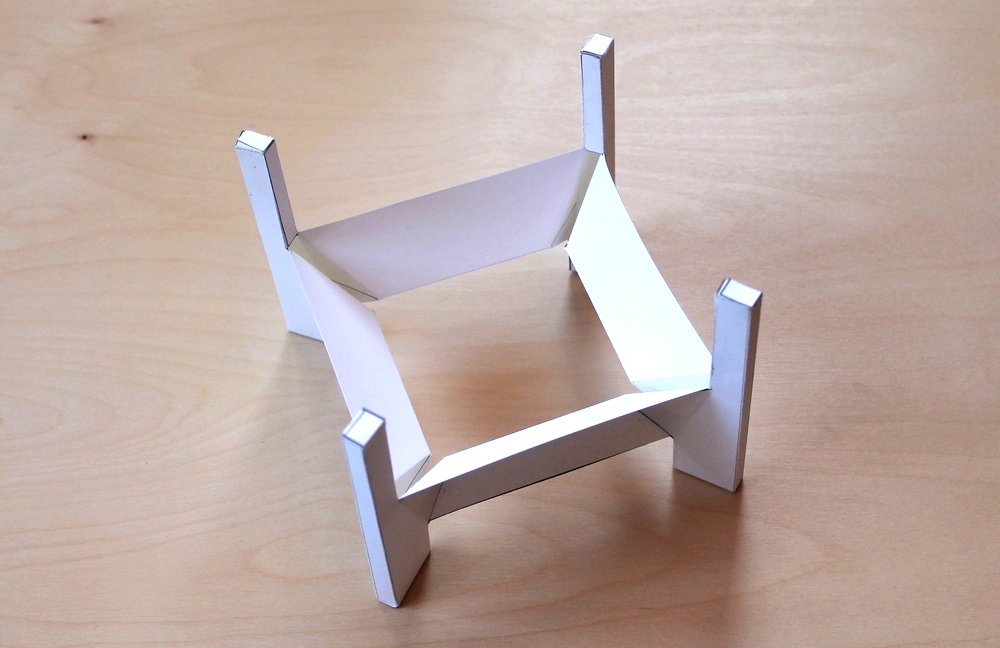
Making a Stand for the Bowl
I designed a fancy stand for the bowl of this hemispherical sundial, but it's almost as much of a pain to make as the bowl itself. If you just want a simple stand you can make in five minutes, you can make a simple conical frustum, or a simple pair of crossed supports:
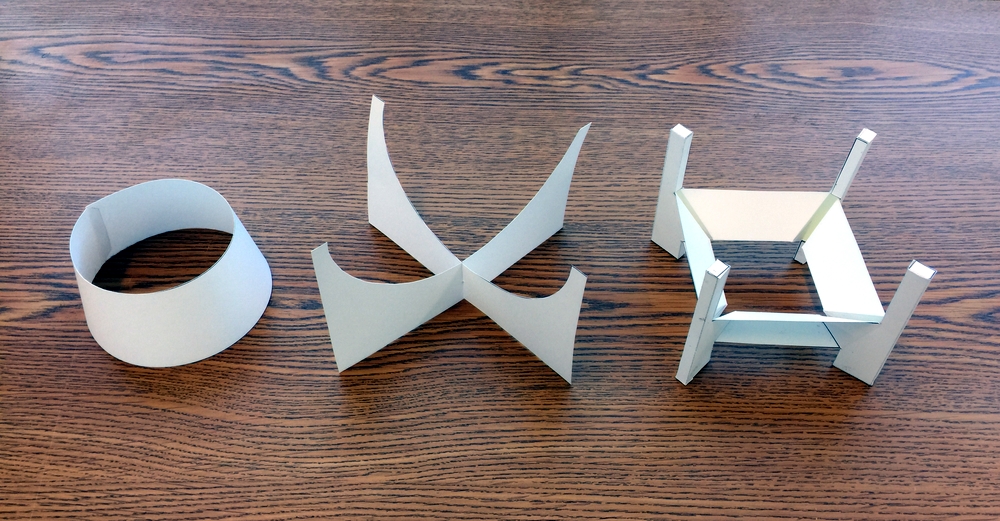
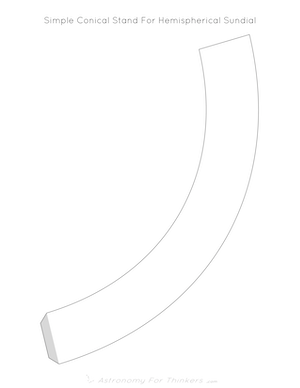
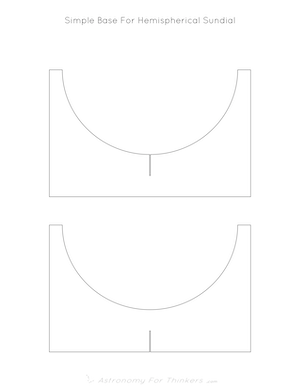

One benefit of the simple conical stand is that you can rotate the bowl slightly if you need to, to help compensate if your table isn't perfectly horizontal, or if you have made a bowl for a latitude that isn't quite right. I think the two “simple” stands are easy enough to make without instructions. If you want to make the “fancy” stand, here are the instructions:
The fancy stand is composed of four support struts at the corners, and four folded braces in between. The braces or brackets should look like this after you cut them out, fold them, and glue the ends together:
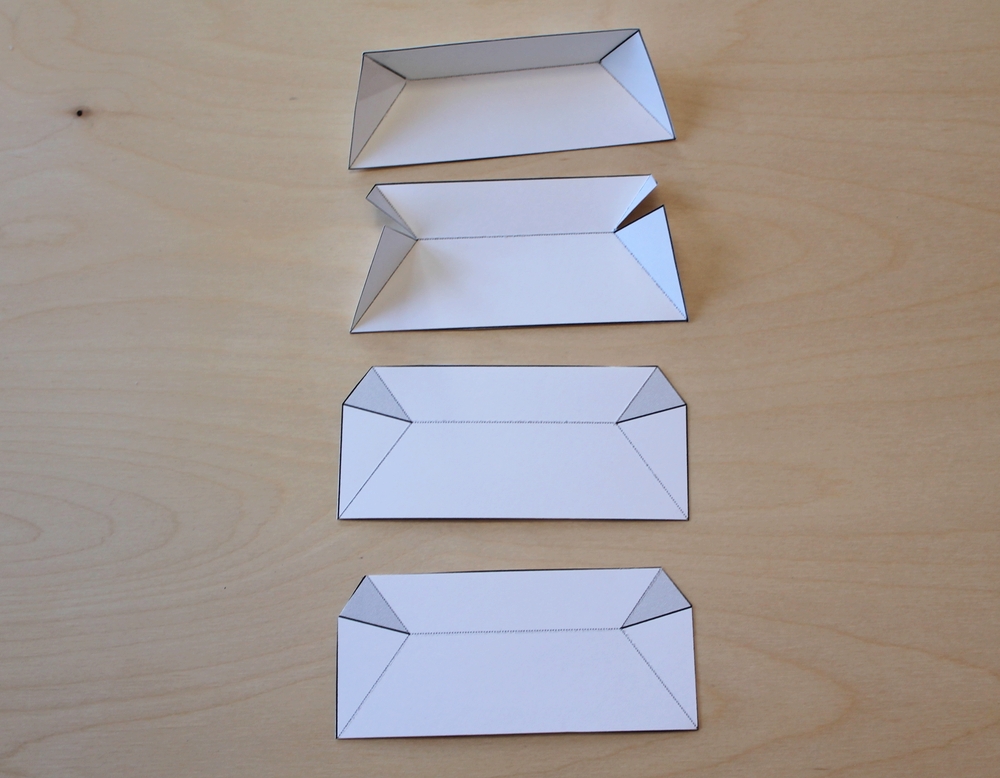
Similarly, the four support struts need to be cut out, folded, and glued together. I haven't included any gray “glue areas” on the parts, because it really doesn't matter which flaps are glued over which flaps. All flaps will overlap or be overlapped by another flap, but it really doesn't matter which way they go. In the end, there should be a rectangular top and bottom, with two triangles protruding from one side. In various stages of construction, the four struts should look like this:

Now if you glue the ends of the folded braces to the triangles of the support struts, you should have something like this:
If you are using the “arrowhead gnomon”, and you live within 30 or 40 degrees of the Equator, you may find that the tabs of the gnomon clash with the support columns. In this case, just turn the stand so that the four corners are aligned NW, NE, SE, and SW, instead of N, S, E, and W. You may prefer that orientation anyway.