
Homemade Globes
Printable templates for making your own globes of the Earth, the Moon, and Mars, with paper, glue, and wooden or styrofoam craft spheres.
How Commercial Globes Are Made
Astronomy is all about spheres, and I often wished while teaching astronomy that there was a simple way to make spherical globes or hemispherical domes in the classroom, as a fun craft project, with paper or other basic craft supplies. But there is a fundamental problem in trying to make a round object from flat supplies. You can curl paper into a cylinder or cone, but you can’t give it a curve in two directions at the same time. You can’t wrap flat paper around a ball without making it wrinkle, crumple, and warp. (The reverse problem — trying to make a sphere flat — is actually a fundamental problem in the construction of flat maps, and is the foundation of the entire science of map projection).
So how do they make commercial globes? Most historical globes were just paper wrapped around cardboard, and many globes are still made this way. The colored designs depicting the surface of the globe are normal printings of ink onto paper, and these paper maps are wrapped around a spherical cardboard base. How do they get the printed paper map to curl neatly into a spherical shape without crumpling? The trick is to break the map into specially-shaped tapered slices, resembling the lengthwise sections of the beach ball, so that each slice will then wrap around the sphere and meet its neighbors neatly at the edges. You can see the construction process in action in the How It's Made series (which I highly recommend), in their episode on globes. I also enjoyed this older 1955 video, from British Pathé. Look closely at a finished paper globe sometime and see if you can find the seams where the slices came together.
(The formation of a sphere by slices is also the way they make beach balls … and nowadays, you can actually buy cheap inflatable ‘beach ball globes’, with the images of the earth printed onto the slices of plastic. You can see how flat material is made into a sphere very clearly in the case of a beach ball. By the way, the official technical name for each ‘slice’ of the flattened globe is a ‘gore’ — possibly derived from an archaic word for spear. But in informal contexts, I usually refer to them as ‘petals’. It sounds so much nicer. I’m tempted to refer to the entire hemisphere-star pattern as a ‘corolla’, but that may be venturing too far into obscurity. With students I just call it the ‘flower’ or ‘star’.)
Now, is there a convenient way to do something similar in the classroom? Is there a way to make DIY homemade globes? Craft stores sell styrofoam and wooden spheres in various sizes, and it isn't too hard to paste paper onto them. The trick is to find or make map templates containing decent imagery, in the right shape. Some time ago, I worked out how to print the ‘corolla’ or star-pattern, with constellations drawn in, that could be cut and folded into celestial spheres. Getting photographic imagery of planetary bodies to come out right was more challenging, but I finally worked out how to do it. NASA sometimes publishes composite photographs of the entire surface of the earth and a few other solar system objects, and I worked out some computer code that could take such a source image and re-shape it into a globe template in various sizes. These printable templates can be cut out and pasted onto solid craft spheres, thus yielding a globe. Without the heated hemispherical press that the professional globe-makers use, we won't get beautiful professional results, and there are a few problems that remain to be solved, which I’ll address below. But I’ve managed to get a few decent results using my templates, cheap craft spheres, and some Mod Podge. Furthermore, I’ve made templates for globes that I’ve never seen available commercially, including the Earth with clouds (my favorite), and the Earth and Moon to Scale.
Supplies for Homemade Globes
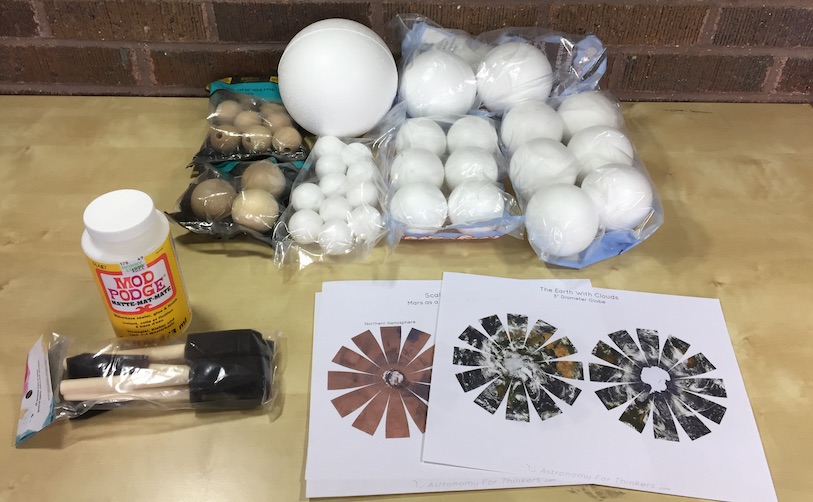
So here’s what we’ll need to make our own globes: we’ll need a solid sphere of some kind to serve as a base, a printed template containing the image of the surface of a celestial body, of the right size to fit our solid sphere, and some glue or Mod Podge to glue the paper to the ball.
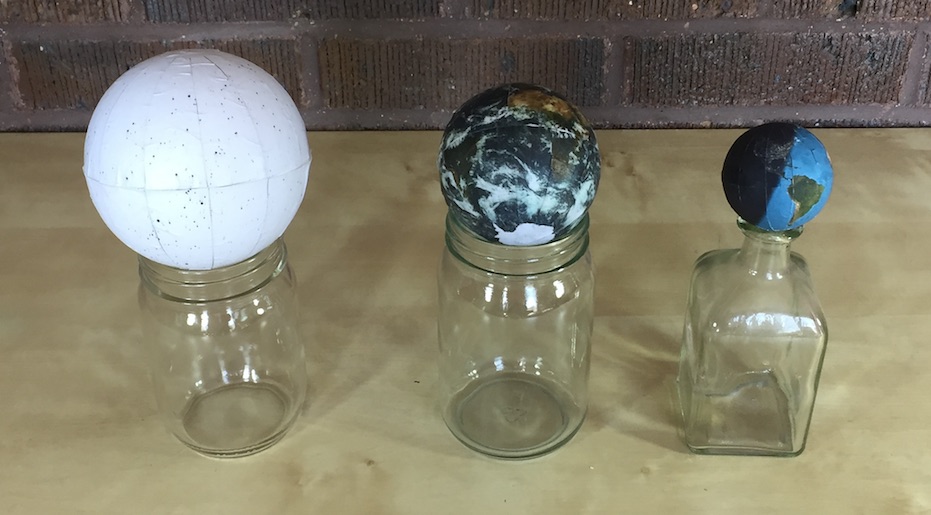
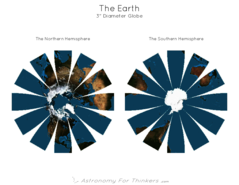
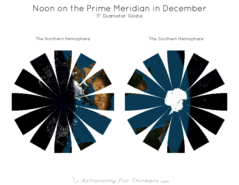
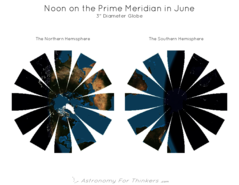
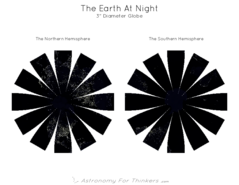
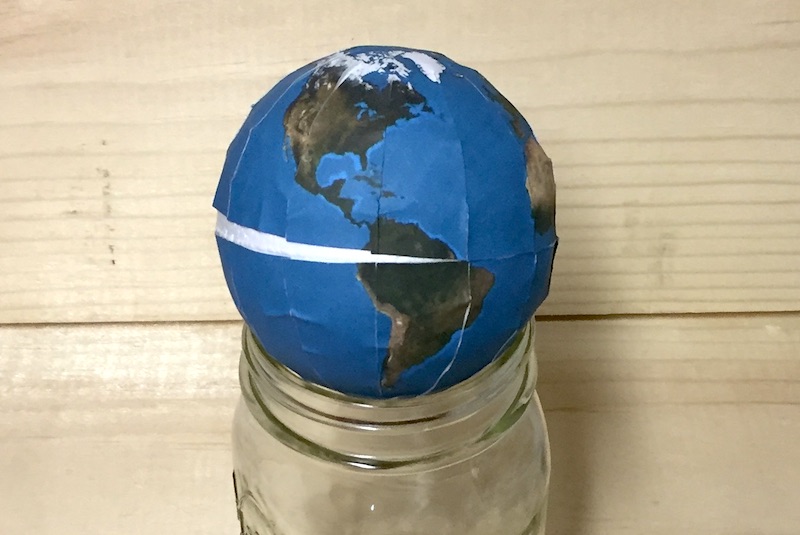
Wooden spheres have a nice heft and solidity to them, but unfortunately are only available in small sizes. The largest diameter at my local craft stores is 2 inches. Styrofoam spheres are available in larger sizes, but the larger sizes only come in 2″ increments, and for spheres above 5" in diameter, a single hemisphere map won't fit on a single piece of normal 8½″x11″ letter paper. (A hemisphere map for a 5″ sphere would fit, barely, on a single piece of paper, but 5″ diameter spheres are much harder to find than 4″ or 6″ spheres.) Thus I decided to create templates for 2″, 3″, and 4″ diameter globes, for which you should be able to easily find base spheres. You can see previews of the 3″ diameter versions below, and you can also find 2″ and 4″ versions in the download section to the left. I have included a variety of images for a variety of globes, and I’ve also included blank templates, just in case any artists out there want to draw and create their own imaginary worlds. (Come to think of it, I wonder if it would be possible to create writable globes, by using dry-erase paper of some kind? The 1955 video did say something about chalkboard globes…) In any case, here are three examples of globes that I have made using my templates, and below that are the previews for the 3″ globes:


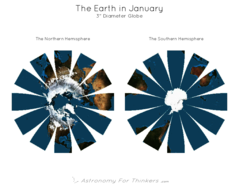
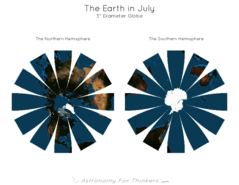
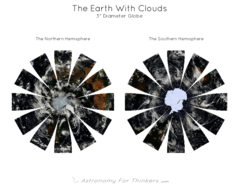
(Side note on the seasonal globes: I was hoping that the difference between July and January would be really dramatic, and would vividly show the annual shifting back-and-forth of the polar ice caps between the north and south poles. Unfortunately, they aren’t as dramatic as I’d hoped — you can barely see any difference in the southern hemisphere — because the source images I use do not include sea ice. Sea ice is made to be the same plain color as open water in the composite photographs. Many thanks to NASA for providing beautiful, detailed, composite photographs of the entire surface of the earth, and one for each month of the year as well … but I sure wish the images included sea ice. Probably it was judged to be too fleeting, too irregular, and too inconsistent to be part of a ‘standard’ photo set.)
Making the Globes
I’ve made six or seven globes so far using my templates. I can offer a few tips on the globe construction process, and if you discover your own globe construction tips that you would like to share, I would love it if you would do so in the comments section.
Cutting: This is pretty straightforward, if a bit tedious. Try to cut along the edges of the image as closely as you can, but err on the side of cutting off imagery, rather than leaving white slivers along the edges of the petals. The final globe will look nicer if you do. (I could have made star-patterns with fewer petals, which would be easier to cut out, but then they would wrinkle more. I’m looking into creating designs that can be cut with a Cricut machine, but for now, you just have to do the work yourself.)
Gluing: I’ve made all of my globes using Mod-Podge. If you slather your solid sphere with the stuff before applying the paper, you can generally slip and slide the paper around for a short period of time before the glue hardens, giving you a little time to line up all the edges nicely. Start with one petal, and work your way around, carefully aligning each petal to the previous one. I generally let the first hemisphere dry before trying to apply the second hemisphere. After getting all the petals lined up and stuck in place, I used to slather more Mod-Podge over the outer surface of the paper, using the sponge to smooth out wrinkles, and letting the glue dry into a protective coat. Unfortunately … and here is one of the biggest remaining problems with these homemade globes … the Mod-Podge absorbs the colors of the printer toner and smears them around, and you end up with ugly smears and faded spots. I tried allowing the ink to dry for 24 hours before applying the paper to the sphere, but this didn’t seem to help. Until I find a better solution, I just apply Mod-Podge to the solid sphere, then apply the back of the paper to the Mod-Podge, and leave it at that, without trying to cover the printed surface of the paper with an outside coat.
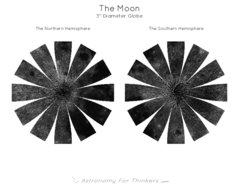
Lining up Hemispheres: When you apply the second hemisphere, how do you make sure it is turned the right way so that it properly aligns with the first hemisphere? I’ll assume you are familiar enough with global geography that you can do this yourself for all of the globes of the Earth. If you are familiar with the ‘seas’ of the moon, you can use those as your alignment guides when aligning the hemispheres of the moon. If not, you might notice there is a faint line running down one side of the moon, running from pole to pole, on the left side in the Northern Hemisphere picture, and on the right side in the Southern Hemisphere picture. This is due to a glitch in the source image that I used for creating the moon map, but it does make a useful alignment guide. Just make sure these two lines meet each other when you position the second hemisphere. For the celestial sphere, the constellations will need to be aligned. If you are unfamiliar with your constellations, I suggest using Orion as your alignment marker. His shoulders are in the northern hemisphere, on the right-most petal. Find the two brightest stars near the ‘foot’ of that petal. That’s the top of Orion. His belt and knees are in the southern hemisphere, on the left-most petal. Find three stars in a row at the outer edge of that petal. That’s Orions Belt. Those two petals need to go together when you assemble the celestial sphere. (Incidentally, the two brightest stars in the sky — Sirius and Canopus — are on the same petal as Orion's belt, and the 6th brightest star in the sky, which is also the 3rd brightest in the northern hemisphere, is on the same petal as Orion's upper half. That star has three dim ones forming a triangle right next to it, like children next to a parent. That's Capella and the kids.) Mars will be the most difficult to align, because its surface is relatively featureless, at least in my source image. If you just guessed when you aligned, perhaps nobody would know the difference. If you really want to do it correctly, however, notice the particularly dark patch on the right-most petal of the northern hemisphere, and the white patch ‘below’ it, on the corresponding left-most petal of the the southern hemisphere. Those two petals need to go together. (Incidentally, I don’t know much about Mars geography, but I do know that the largest volcano in the solar system is located on Mars. It's called --Olympus Mons--, and you can see it as the faint circular object on one of the upper-left petals in the northern hemisphere. I believe the white patch is Hellas Planitia.) In every case, for every globe, the hemispheres are already aligned to each other on the paper, but you will need to preserve this alignment when you transfer them to the globe.
Problems to be Solved: I see three significant problems that need some work. First, as I already mentioned, the Mod Podge has a tendency to absorb the color and smear it around, which really detracts from the beauty of the spheres. Until I find a better solution, I just try to keep the outer printed surface dry and free from paste. A second problem is that the templates don't always fit the globes. I wonder if there was a manufacturing defect in my 3″ styrofoam spheres, because all the other templates fit their respective spheres just fine. One of my goals is to write a web app that lets you nudge the size of the template up or down to better match arbitrary manufactured spheres, but for now, if you find that the 3″ template doesn't fit your 3″ sphere, you'll just have to try a 2″ or 4″ sphere instead. The third ‘problem’ is relatively minor and to be expected. Even with this ‘petallized’ or ‘gored’ design, there is still sometimes a little bit of wrinkling in the paper at the edges of the gores. If you are careful, however, you can generally keep this to a minimum. It would be less of a problem with a larger number of gores, but then it would also be harder to cut out and to paste to the sphere without tearing the petals or getting them stuck in the glue before you can align them all.
Sticker Paper: As an alternative to decoupage, you can simply print the templates onto full-page sticker paper, such as this, then cut out the star-shaped stickers and place them on the base sphere. This is simple and easy, though not quite as permanent or durable as pasting.
Regrettably, this example also illustrates the occasional mis-match that happens between the templates and the craft spheres. I measured my 3″ sphere, and discovered it was a tiny bit larger than 3″ … and it was composed of two hemispheres which were slightly mis-aligned, for some reason. Perhaps you can find higher quality craft spheres. As I mentioned, making a web app that lets you choose an arbitrary size is on my to-do list.
The Earth and the Moon to Scale
Whenever I taught astronomy, I always enjoyed the unit on the “Three Spheres.” We would follow in the footsteps of the ancient Greeks, we would pay close attention to eclipses and to the phases of the moon, and with some careful thinking and a little clever geometry, we would work out from the visible clues in the sky how large and how far the sun and moon are from us, and how large our own sphere is. This thinking exercise would culminate in trying to make a model to visualize what we’ve figured out. (There's an abbreviated version of this story in my curriculum blueprint for astronomy.) If we were to make a toy globe, and a toy moon, and we wanted to make them the right size compared to each other, how large should we make each of them? If we wanted to put them the right distance apart, so that the moon is the right distance from the earth, how far apart should we put our two toy globes?
!!! Spoiler Alert !!!
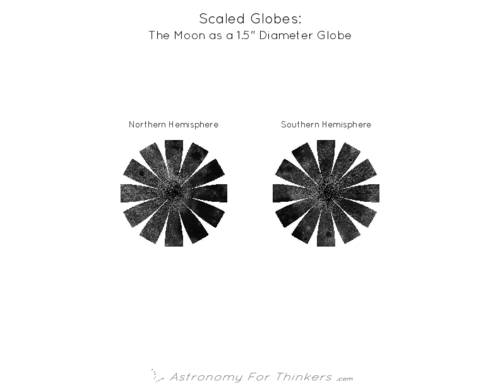
As it turns out, the moon is pretty nearly one-fourth the size of the earth (in diameter), so if we want to make scale models from craft spheres, we can pick a 6″ diameter sphere for the earth, and a 1½″ diameter sphere for the moon. I prepared templates for the earth and moon at these sizes if you want to do this. The earth is too large to fit a whole hemisphere on a single piece of letter-sized paper, so I had to split the earth into four pieces. (If you compare the equatorial diameters of the earth and moon, the exact ratio is actually a little bit more than a fourth. For a six-inch earth, the moon should ideally be 1.64 inches across, but for our purposes, 1½″ is close enough.)
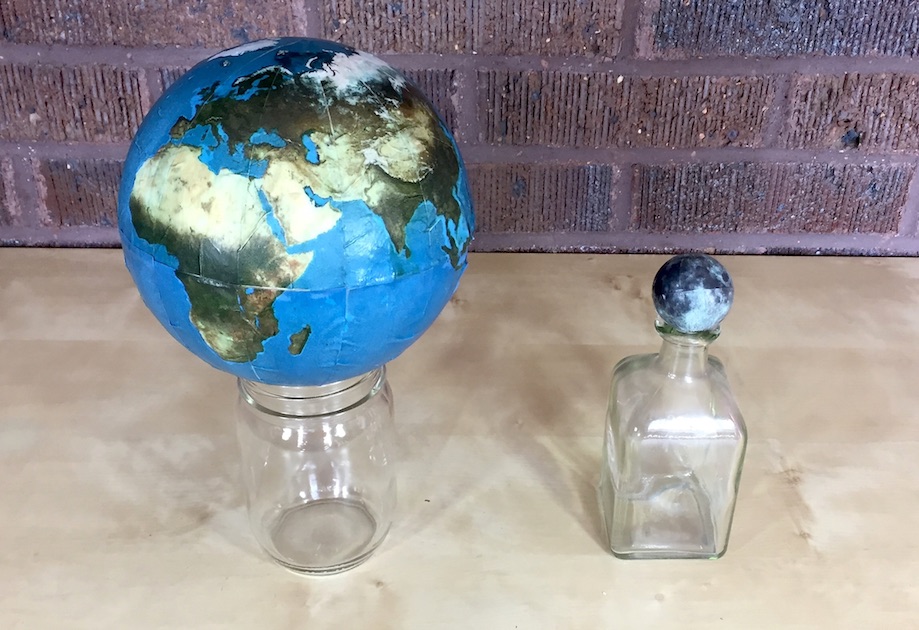
Now how far apart should we put them? The distance between the earth and moon varies a bit — not so much that a casual observer could notice the moon looking larger or smaller, but enough that the news media will occasionally get excited about a ‘supermoon’. In our model, with a 6″ Earth and a 1½″ Moon, the distance between them should be between 14 and 16 feet. If you wish to model the average distance, make them 15 feet apart. If you want to model a supermoon, put the moon 14 feet away, and for the moon at its farthest, put it 16 feet away.
In the templates given here, I threw in Mars for fun, since I have an image for it. Mars is slightly larger than half of Earth’s diameter, so we can make a 3″ globe for Mars if we wish to add it to our model. (If we were being super-precise, it should be 3.19 inches in diameter to match a 6″ Earth.)
What about the sun? If we want to make a globe for the sun, how big would we need to make it, and how far away should we put it? To match the 6″ Earth and the 1½″ Moon, our sun-globe would have to be 55 feet across, perhaps the size of your school’s auditorium, and we would need to place it over a mile from our Earth globe — 5870 feet. (And our Mars model, if we want to include it, would have to be almost two miles — 8900 feet — from the sun.) Incidentally, do you notice any other interesting comparisons? If you have any active-minded students, perhaps you can coax them into noticing an interesting implication of all of this... The sun itself is actually larger than the entire orbit of the moon. If you compare diameter to diameter, the sun is over half again as large as the orbit of the moon.