Printable Polygonal Paper Planispheres
A dodecagonal version of the printable planispheres, intended as a simpler, easier to assemble, elementary planisphere.
Polygons vs. Circles
In principle, I’m pleased with my circular planispheres as teaching tools, but they are a nuisance to cut out. Cutting out circles is harder than cutting straight lines, and cutting out all of those windows is an onerous task. My students would often complain that the scissors were making their hands sore by the time they were done.
As an alternative design, I wondered if it would be possible to make a polygonal version of the planisphere. It wouldn't turn smoothly like a circular version would, but in other respects, I thought it might make a good “elementary” or “starter” version. I thought it might be especially helpful for younger kids when they are first exposed to the concept of a “world map of stars,” and how to make one that you can turn to show which stars are up at any given time.
This page presents my attempt to make such a planisphere. It is not intended as a precision measurement device, but merely a simple introductory planisphere, suitable for younger children. While I have successfully used the circular versions myself in real classrooms, this version is new and I have never actually tried it out with children. If you do, I’d love to hear how it goes. (Although, as with planispheres and “celestial spheres” in general, I think the “world map of stars” is best taught after the individual constellations. One starts simply by looking up, enjoying the night sky, and learning to recognize the patterns and the landmarks. Then after you have several “maps” of different parts of the night sky, you can put them together into a whole sphere — or planisphere. For learning the constellations you might try my constellation worksheets.)
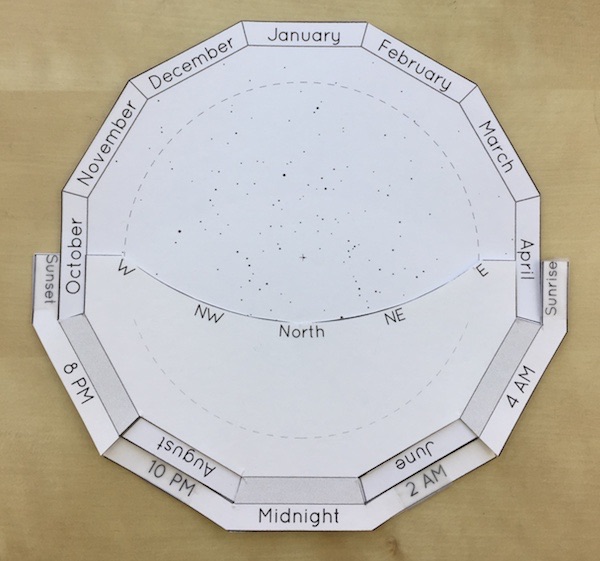
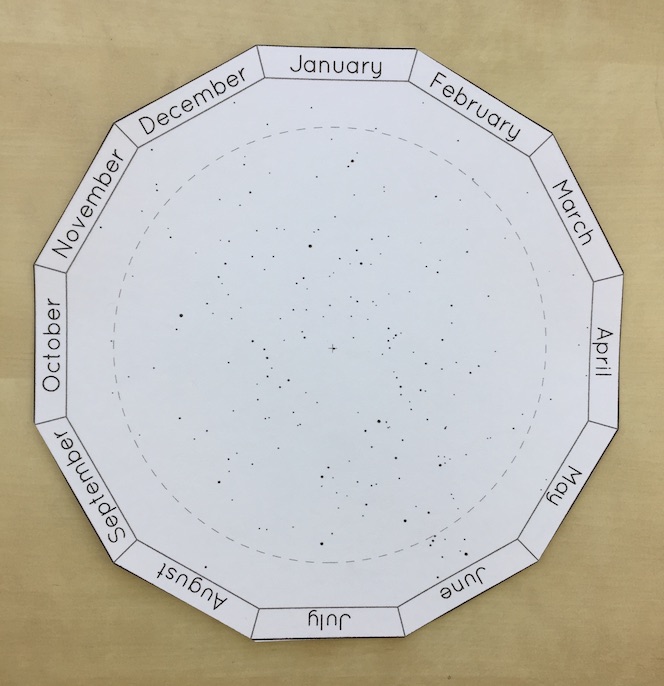
As with circular planispheres, the disk represents the “world map of stars,” and the cover represents your local horizon, hiding half of the stars are revealing the other half. The cover will be different depending on where you live, but the disc will always be the same. (If you want to make several covers for different latitudes, you can re-use the same disk in all of them.) For this polygonal planisphere, the “disks” are all dodecagons, and each of the 12 edges represents one month. Except for the curve representing the horizon, the outer edges of the cover are all straight. There are fewer windows to cut out than in the circular version, and the windows contain all straight edges as well. If you want, you can even cut straight across the outer rim to get the scissors into the windows, because the outer rims will be glued back together anyway.
Making the Planispheres
Start by choosing the design for the latitude nearest to your own, and downloading the template. The files include blank as well as labeled versions, in case you want to write the labels yourself. (Drawing your own labels is a good learning exercise, and you can also use color, and make whatever other decorations you like.)
I have generated the PDF files so that you should be able to use double-sided printing and have your printer produce a double-sided celestial disk, with constellations and months lined up on both sides. However, I find that double-sided printing tends to be a bit quirky, and you may need to fiddle with the settings of your printer to get it to come out right.
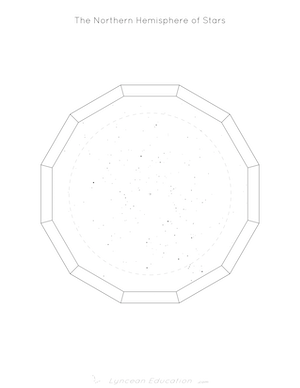
To cut out the “disk,” simply cut out around the outline. Assuming your printer handles double-sided printing reasonably well, this should produce a dodecagon with the northern hemisphere of stars on one side, and the southern hemisphere of stars on the other. You may prefer to print the two sides separately, and then glue them back-to-back, but make sure that the months are lined up when you stick them together. If you are printing the unlabeled version, and you don't know which month is which, try to find Orion, and line him up on both sides. (Orion is the famous hour-glass shaped rectangle with the triplet of stars in the middle marking his belt. The dashed circle is the “Equator of Stars,” and the equator runs right across Orion's belt. Orion lies in the middle of June on both sides.)
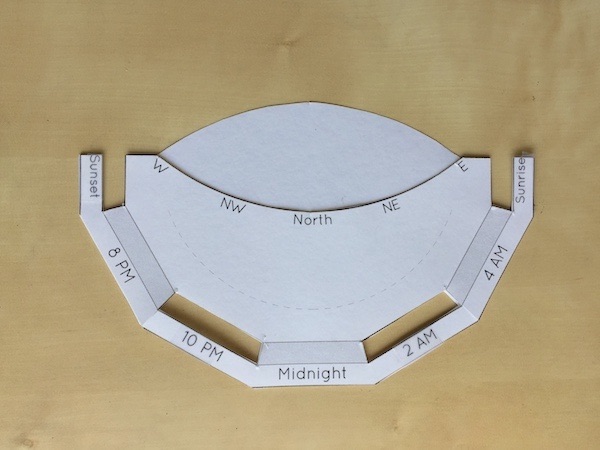
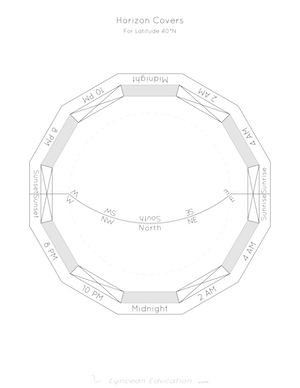
To cut out the covers, start but cutting out the dodecagon around the outline, then cut across the middle along the horizon line, then cut out the windows by removing all pieces marked with an ‘X’. You should get three pieces that look like this:
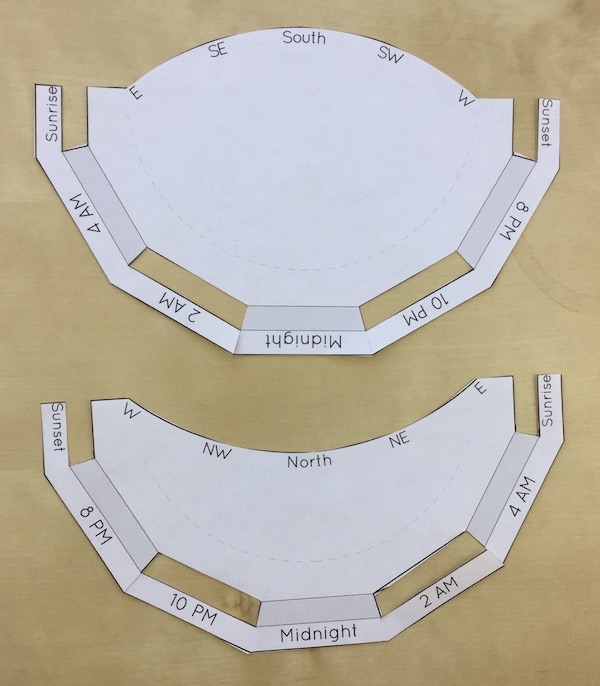
The rest is simply a matter of taping the two sides together by passing small pieces of tape through the windows, and wrapping them around the outside rim of the cover. When you place the disk into the cover, make sure to have the “Northern Hemisphere of Stars” behind the northern horizon of your cover, and the “Southern Hemisphere of Stars” behind the southern horizon.